Starting Cloudvanti with
Sitefinity
Jump to..
Jump to..
Restore Database
Database Restore CD Process
The Database Restore function allows you to restore the database via the Release Pipeline deployment. Be sure to have the database file in .bacpac format before you upload it into your Azure Storage Account.
The CD Pipeline is required to be run manually with these two (2) input parameters:
- BacpacFilePath, the backup file path within the designated Azure Storage Account.
- BackupBeforeRestore, when set to True, the pipeline will backup the database before the process of restoring. Setting it to False skips the backup process.
The backup file will be stored in the system folder of the designated Azure Storage Account. Click Database Backup Folder to learn more.
Take note that the pipeline restored for the Staging and Production environment are separated.
Staging Restore Process
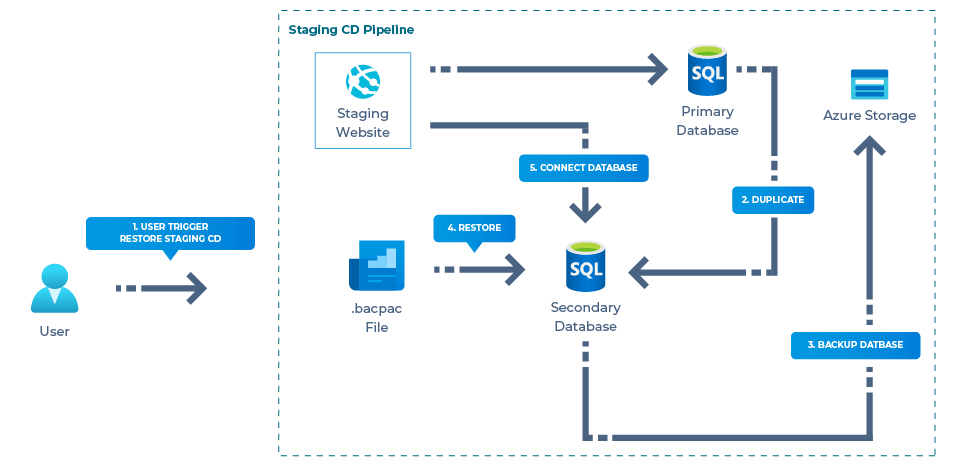
Here is the database restore process in Staging.
- Create a new release within the <subscription-name>-DB-Restore-STG.CD Pipeline. It will automatically be triggered into the database Staging CD Pipeline.
- The primary database will be duplicated to the secondary database. (This step will be skipped if BackupBeforeRestore is set to false)
- Then the secondary database will be exported to Azure Storage. (This step will be skipped if BackupBeforeRestore is set to false)
- Restore the database from Azure Storage to the secondary database.
- Connect the Staging website to the secondary database and delete the primary database.
Production Restore Process
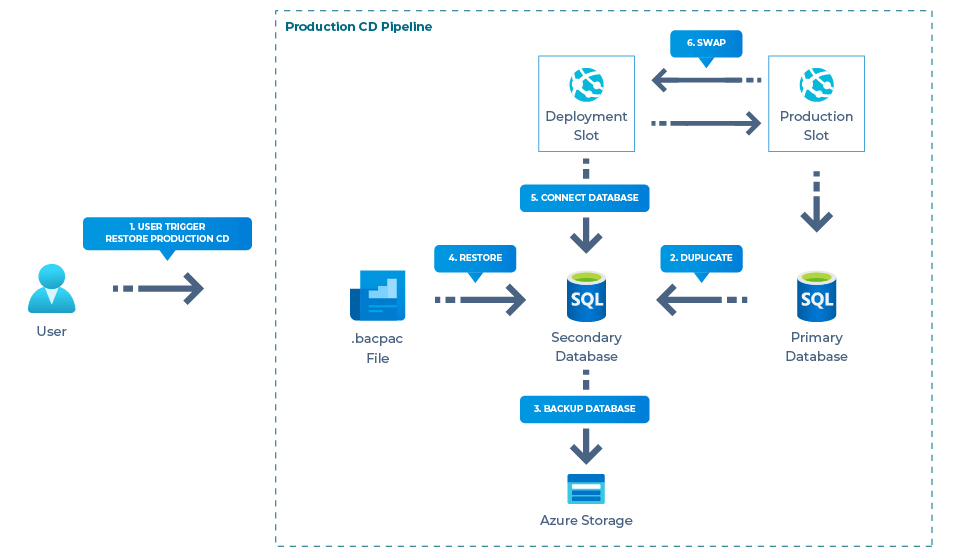
Here is the database restore process in Production.
- Create a new Release and with the name <subscription-name>-DB-Deploy-PRD.CD. It will automatically be triggered into the database Production CD Pipeline.
- The primary database will be duplicated to the secondary database. (This step will be skipped if BackupBeforeRestore is set to false)
- Then the secondary database will be exported to Azure Storage. (This step will be skipped if BackupBeforeRestore is set to false)
- Restore the database from Azure Storage (the .bacpac file) to the secondary database.
- The secondary database will be connected to the deployment slot. The deployment slot will begin to initiate the warm-up state. Should the deployment slot website warm-up state be:
- successful, the production and development slot will be swapped.
- failed, the secondary database will be deleted and the CD Process will stop.
- After the production and development slot have been swapped, it will enter the warm-up state. Should the warm-up be:
- successful, the primary database will be deleted.
- failed, the production and development slot will continue to swap again. The secondary database will then be deleted.
For the exported database to be transactionally consistent in step 3, you must ensure either that no write activity is occurring during the export, or that you are exporting from a transactionally consistent copy of your database.
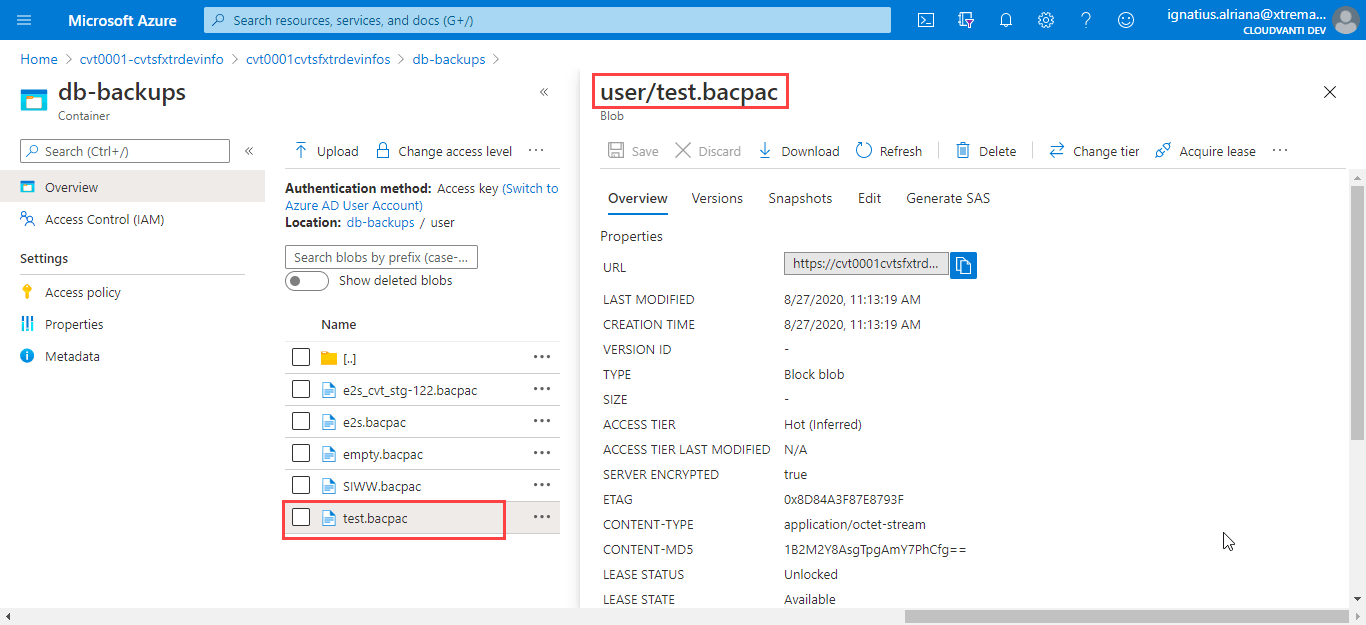
Get Backup File Path
- Be sure to have your database upload to the storage account within the Azure portal. Click Upload Database Backup File to learn more.
- We already provide the link to the Azure Storage location in the Wiki section in Management Portal.

- To restore database from system backup in Staging or Production, choose system folder. Choose user folder to restore from the uploaded database backup file.

- Click on the file you want to restore and copy the path.
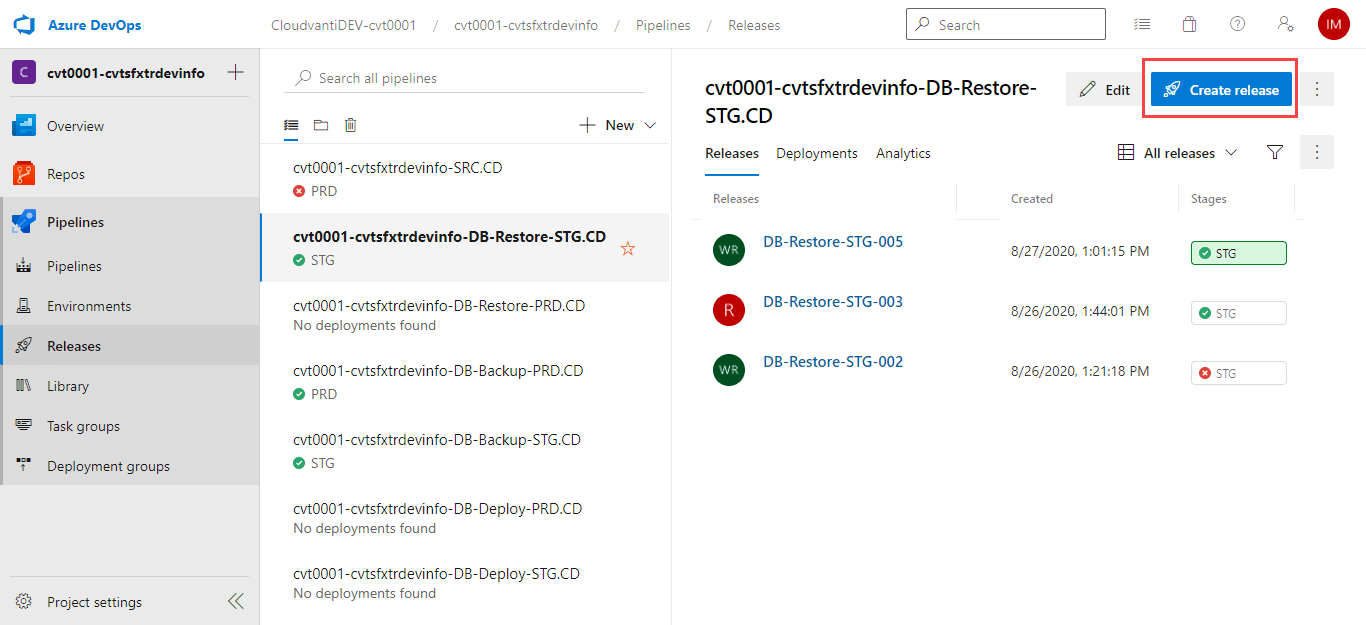
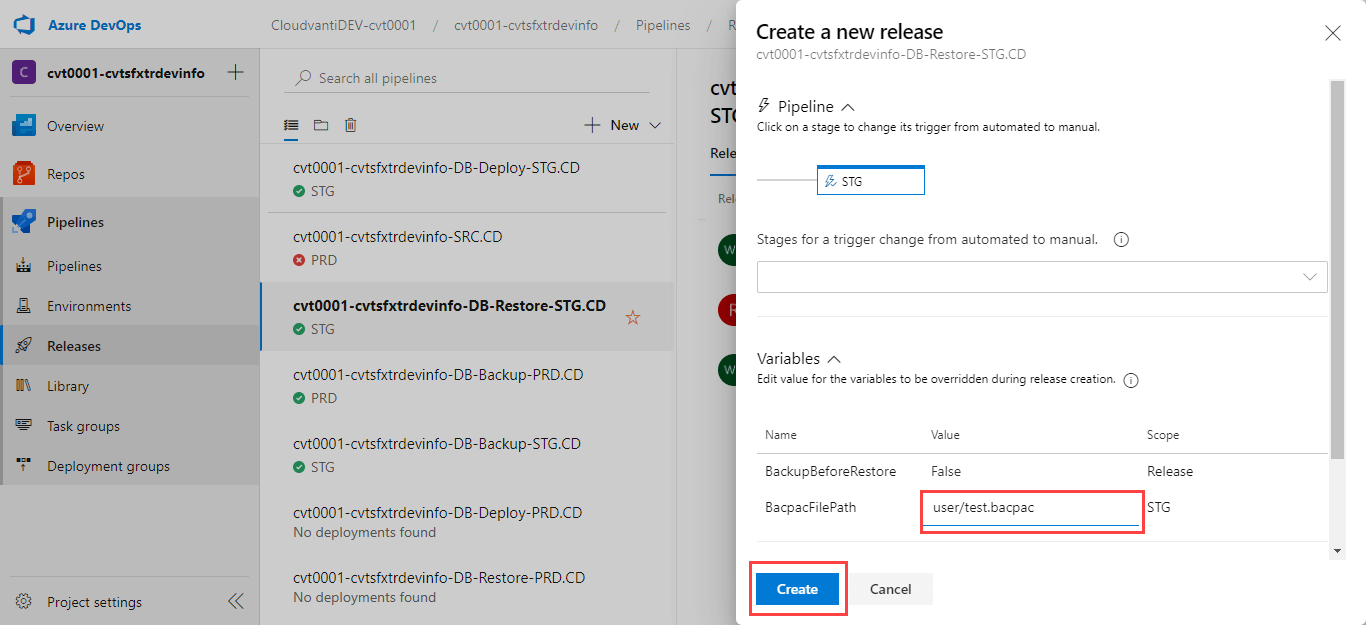
Applying Restore
- Go to Cloudvanti Sitefinity Management Portal >> Pipelines >> Releases.
- Choose the release pipelines
Staging: <subscription-name>-DB-Restore-STG.CD.
Production: <subscription-name>-DB-Restore-PRD.CD.

- Click the Create release button in top right
- Fill this form with the version that you need. For BacpacFilePath, fill it with where you put your database path before in the storage account. User can also set BackupBeforeRestore to True (will backtup) or False (skip backup).
- Users can check and click the stage in the release history for the details of the deployment progress.

- Users can see the log of every task or check what is the error if the process failed.
