Starting Cloudvanti with
Sitefinity

Setting up Your Project
Setting Up The Project for Development
Cloudvanti is a platform that facilitates an environment to customize development code changes. Not only that but also Cloudvanti give customers gain full access to their source code project, deployment, backup, rollback, and restore, as well as CI/CD integrated setup with Repository to enable it to be deployed with custom codes.
Source Code Repository
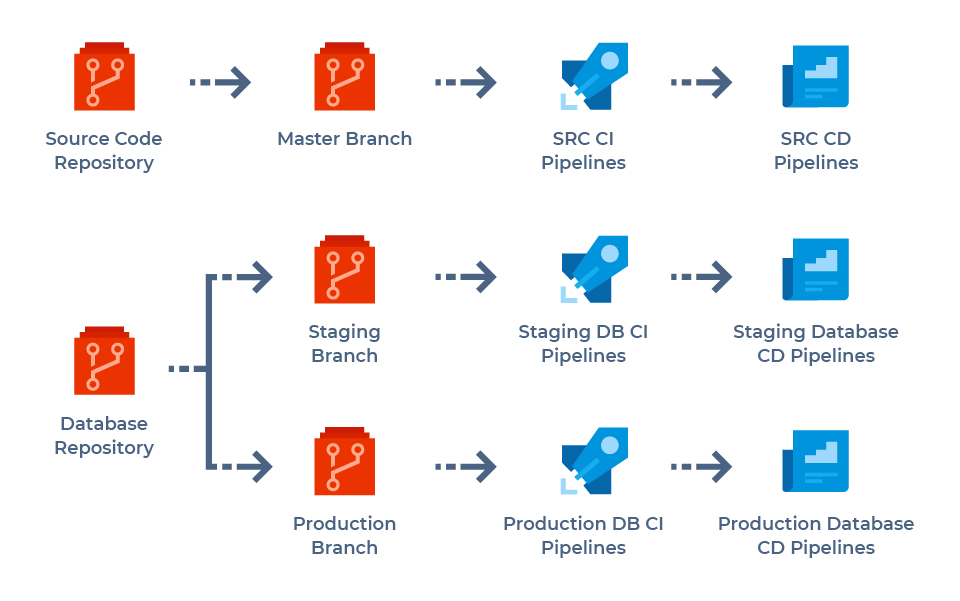
A Source Code repository will be provided as a part of the Cloudvanti Sitecore subscription. This repository will be the place where you put your custom codes that will be deployed to the App Services. The master branch of this repository will be configured to trigger the CI pipeline, and
The Code Repository is provided a branch called the Master Branch. When a code is committed in the Master Branch, it will automatically trigger the pipeline CI. The source code can be deployed to 3 App Services: Staging, Production CM, and Production CD.
Cloning the Repository
The Cloudvanti Sitecore environment comes with a Git repository for you to place your projects in. It can be accessed through the Management Portal.
Here is how you can clone your projects into the repository:
- From the Management Portal select Repos, then select CloneRepository.
<subscription-name>, for source code repository

- Click the Clone button.

- A prompt displaying the repository URL and credentials will appear.

Source Code File Structure
Once your files have been cloned into the Git repository, they will be sorted in accordance to the default file structure of a Sitecore Project known as Default File Cloudvanti (DFC).
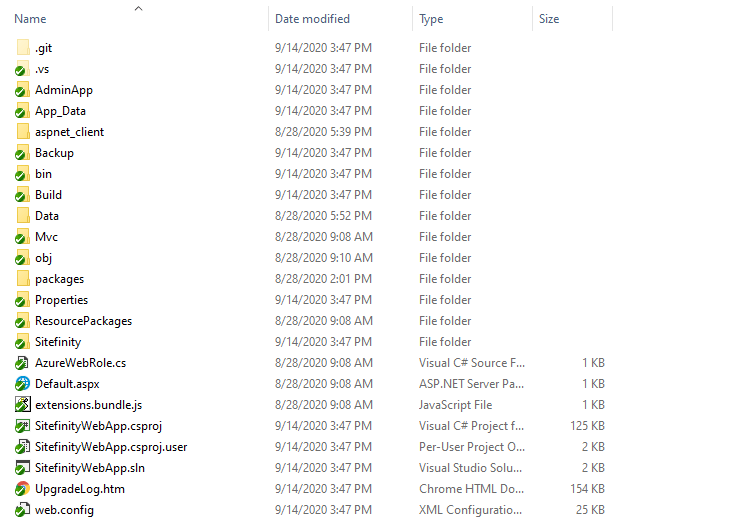
THINGS TO NOTE ABOUT FILES AND FOLDERS IN THE DFC
Cloudvanti CI/CD processes will use files from the DFC. This structure is also applied to existing Sitefinity Projects.
- All default folders and files in the DFC are of the same level as the .git. These files should not be moved to any other folders.

- However, you may add folders and files into the DFC, but it has to remain the same structure as the default.

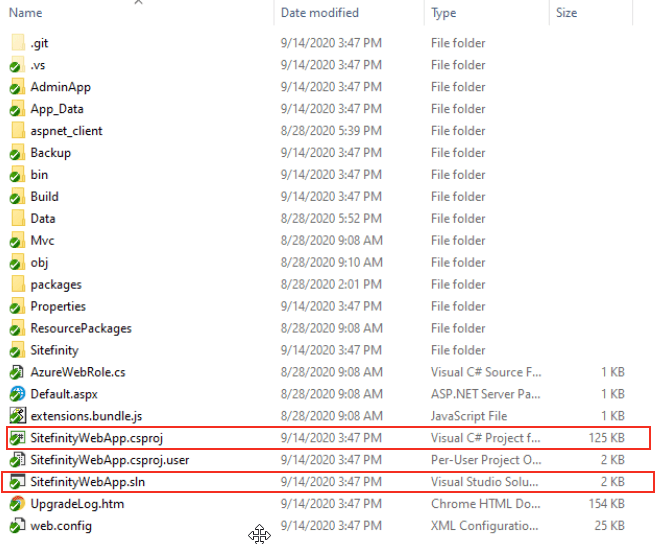
- Provided by default in the DFC, the .sln and .csproj files should be found together in your project at all time as the CI/CD process will be running based on them.
- Be sure to have your dependencies and library referenced from nuget.org.
- Be sure to register all files within the .sln and .csproj folders.
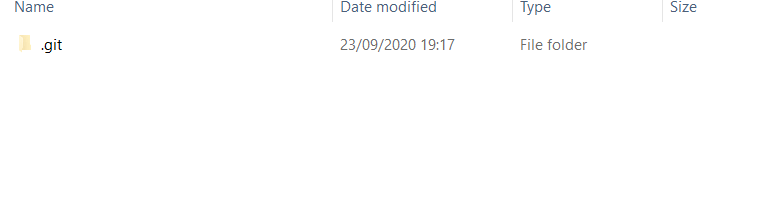
Database File Structure
The .git folder will be the first thing you see after cloning into the Database Git repository.
When deploying new scripts, a new folder will be created which contain the new scripts.

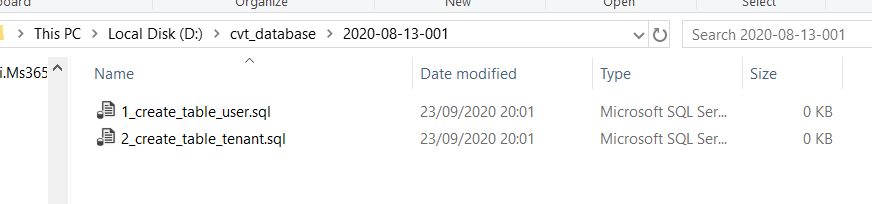
The name of folder and files should also comply with the naming convention as follows:
- Things to note when creating folders
yyyy-MM-dd-zzz- yyyy-MM-dd: DateTime format
DateTime helps to track and log the history of your Deployment database. - zzz: Commit number of the folder, starts at 001
- The number should be unique for files of the same day.
- Folders execute scripts. To deploy the database of multiple commits within the same day, you would have to create different folders per commit. Adding new script to the old commit folder would cause them to repeat other scripts in addition to the newly added one.
For example:
Two (2) scripts are being deployed within the commit pipeline - the create user and tenant tables within folder 2020-08-14-001. A new script is created for a dashboard table to deploy within the same day. A new folder named 2020-08-14-002 is created that contains the new script for it to commit in its instance.


- yyyy-MM-dd: DateTime format
- Things to note when creating script files
x_<filename>.sql- x: Single-digit number (1 - 9) to indicate the execution order of the script. The Pipeline executes scripts listed in ascending order.
- The script file's extension should be *.sql.
- Avoid using unsupported Azure SQL Database statements (e.g. USE statement). For more information, please refer to SQL Documentation.